If you want to express the uniqueness of your brand, you’ll need to create a custom page layout for your Magento 2 website.
Layout and Layout File
A layout represents the way in which a web page is structured. The layout file is an XML file that defines the page structure. When you are developing a Magento 2 website, it usually includes the changes in the page’s appearance and structure. That’s why it is extremely important to truly understand the layout instructions.
A layout file can be located in {module_root}/view/{area}/layout.The area path can be frontend or adminhtml which defines where the layout will be applied.
Basic Elements of XML Files
The basic components of XML files are containers and blocks.
A container is a structure without content that holds other layout elements such as blocks and containers. Containers are very helpful because they contain HTML tags and attributes such as div, header, class, id, etc. Also, they will not render any output if there are no children assigned to them.
A block represents the end of the chain in rendering HTML for Magento. It is a link between a PHP block class that contains logic and a template that renders content. Blocks can have children, grandchildren, and so on. Information can be passed from layout XML into the block via the <arguments/> child node.
Layout File Types
Page layout is defined by two major components: page configuration file and page layout file.
Page Configuration File
A page configuration file is an XML file that declares a detailed structure, content, and meta-information of a page (i.e., <html>, <head>, and <body> sections of the HTML page markup).
Conventionally, page configuration files must be located as follows:
Module page configurations: <module_dir>/view/frontend/layout
Theme page configurations: <theme_dir>/<Namespace>_<Module>/layout
Page Layout File
A page layout file is an XML file that declares the page’s wireframe inside the <body> section of the HTML page markup, for example, a two-column page layout.
In Magento, there are 5 page layout types for the frontend (empty, 1column, 2columns-left, 2columns-right, and 3columns) and 3 page layout types for the backend (admin-empty, admin-1column, and admin-2columns-left).
Page layouts must be located as follows:
Module page layouts: <module_dir>/view/frontend/page_layout
Theme page layouts: <theme_dir>/<Namespace>_<Module>/page_layout
Create a New Page Layout in a Custom Theme
In case you need more than an existing Magento page layout offers, you can create a new page layout. Its main purpose is to create a structured and united set of template layouts for the page display.
Today, we will create a layout for the category page (banner top) with a promo banner.
Create a Custom Page Layout
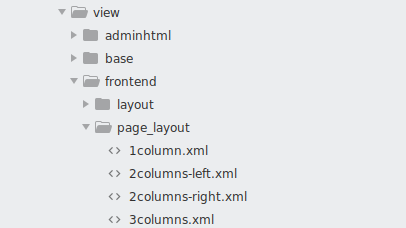
Standard layout files are located at the following path:
vendor/magento/module-theme/view/frontend/page_layout

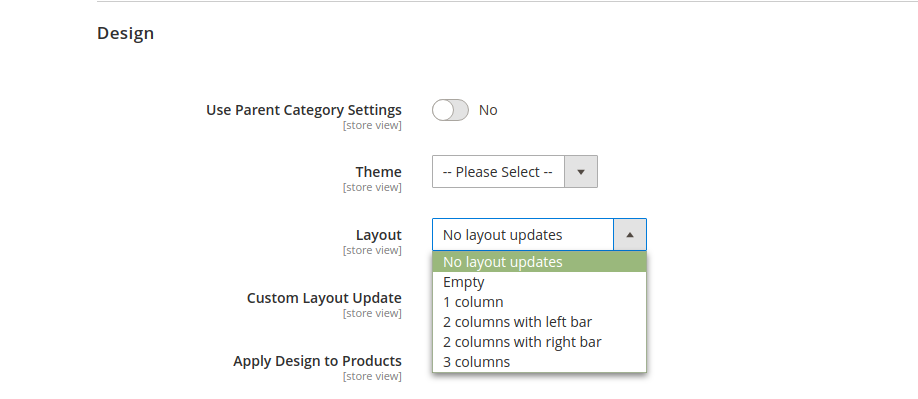
Select the desired layout from the admin panel:

Page layouts can be customized in the admin panel for products, categories, and CMS pages.
In order to create a new layout for the category page (banner top), you have to create the page_layout folder in your theme.
app/design/frontend/<VendorName>/<ThemeName>/Magento_Theme/page_layout/banner-top.xml
The content should be the following:
<?xml version="1.0"?>
<layout xmlns:xsi="http://www.w3.org/2001/XMLSchema-instance" xsi:noNamespaceSchemaLocation="urn:magento:framework:View/Layout/etc/page_layout.xsd">
  	<update handle="2columns-left"/>
    <referenceContainer name="columns.top">
    	<container name="banner.top" htmlTag="div" htmlClass="banner-top" before="-">
    		<container name="banner.top.inner" htmlTag="div" htmlClass="banner-top-inner" before="-">
    			<block class="Magento\Framework\View\Element\Template" name="banner.top.block" template="Magento_Catalog::banner.phtml"/>
    		</container>
    	</container>
    </referenceContainer>
</layout>
Insert a PHTML file in this layout (Magento_Catalog::banner.phtml) before product content and after breadcrumbs on the category page. In this file, you can load your banner:
<img src='<?php echo $this->getViewFileUrl('images/banner.jpg'); ?>' alt="Banner">Next, you need to add a new layout to the layouts.xml file of the theme directory:
app/design/frontend/<VendorName>/<ThemeName>/Magento_Theme/layouts.xmlThe content should be the following:
<?xml version="1.0" encoding="UTF-8"?>
<page_layouts xmlns:xsi="http://www.w3.org/2001/XMLSchema-instance" xsi:noNamespaceSchemaLocation="urn:magento:framework:View/PageLayout/etc/layouts.xsd">
    <layout id="banner-top">
        <label translate="true">Banner Top</label>
    </layout>
</page_layouts>
Note: the value of the new layout ID should match the name of the created page layout XML file.
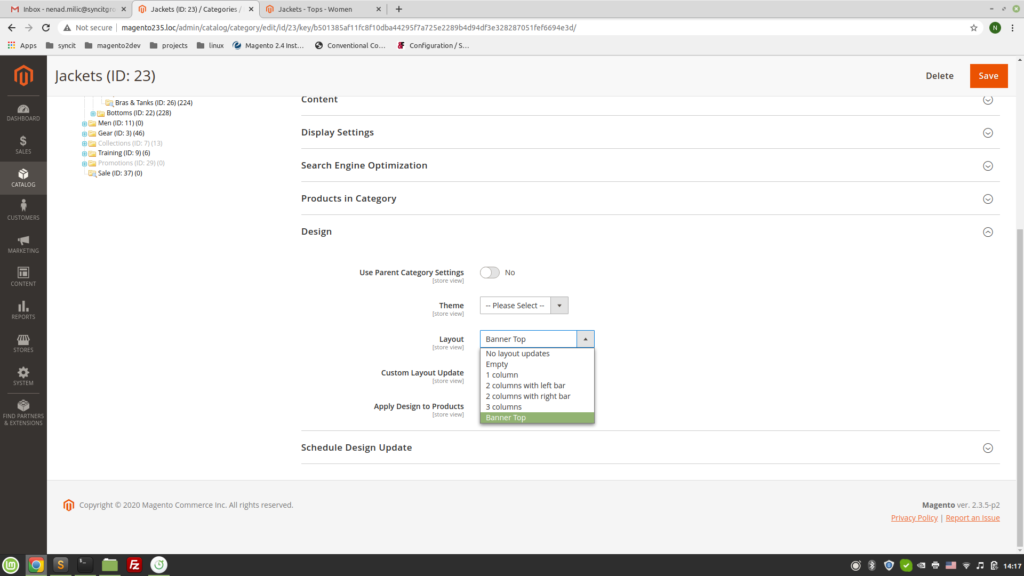
After that, we must select our layout for a specific category in the admin panel. To change the category layout, follow this path: Products > Categories > Select your desired Category. Then, go to the Design tab, and select the desired option from the Layout dropdown.

Conclusion
This is the easiest way to create a custom page layout. With the help of these layouts, we can do a lot of useful things like adding specific CSS classes on the root reference container and style page depending on the design.
Source
