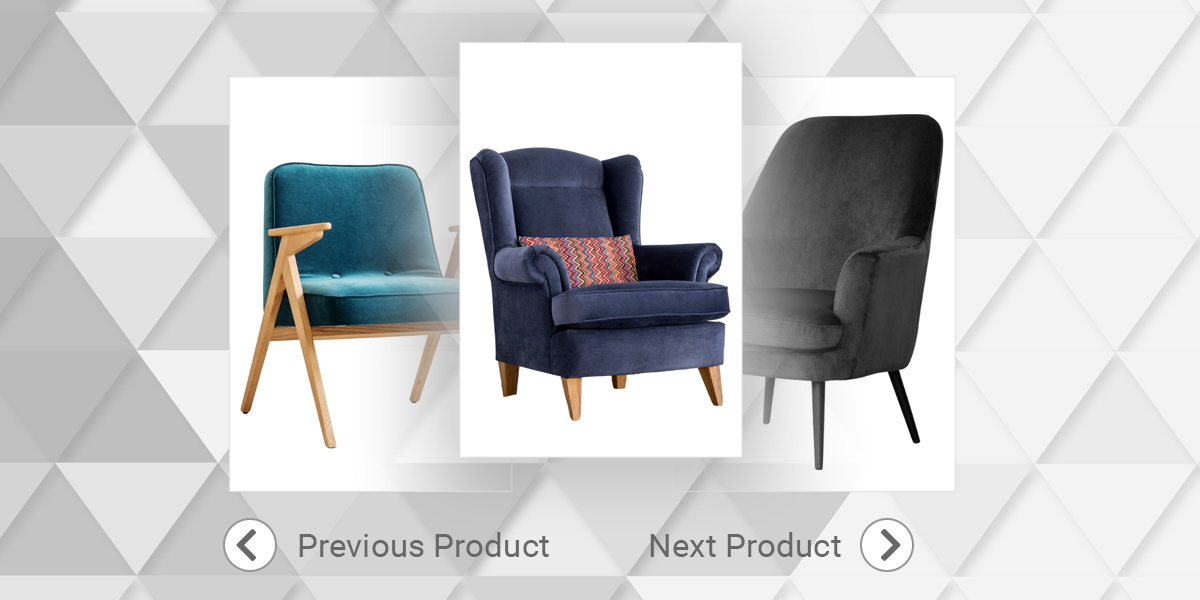
Previous Next navigation is a very useful extension that you can implement in your Magento 2 platform. In the following steps, we are going to explain how to build Previous Next product navigation for Magento 2. Of course, it is going to work with every case and category on your website.
Many people try to make this extension without much trouble. But, they end up hitting walls because of Magento 2 cache-in. In order to prevent this from happening, we have found a better way of using layouts and Ajax calls for rendering blocks.
In this article, you will find pieces of code that are responsible for the improved functionality of this extension.
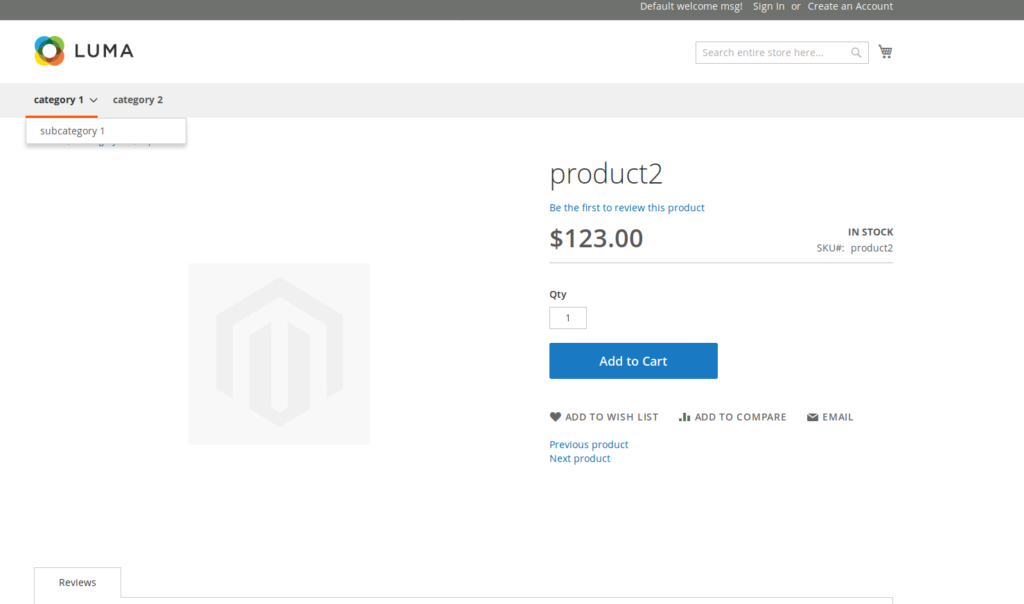
This is how it should look like:

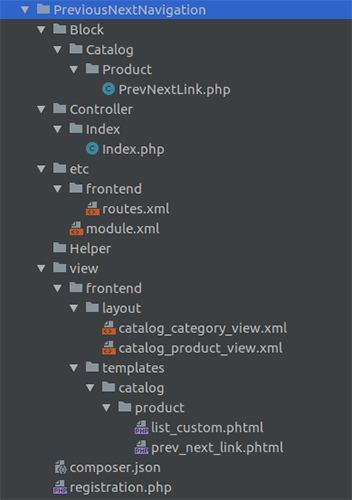
The structure of the module should be like in the image below. So, the first thing you should do is to make a structure like the one in the following image. The module path should be Vendor/PreviousNextNavigation.

registration.php
Firstly, your task is to create a registration.php file. This file is a must for every module. In the registration.php file you should register your module which will load in the following way:
<?php
\Magento\Framework\Component\ComponentRegistrar::register(
    \Magento\Framework\Component\ComponentRegistrar::MODULE,
    'Vendor_PreviousNextNavigation',
    __DIR__
);
PrevNextLink.php
After that, you should create a PrevNextLink.php file in Vendor/PreviousNextNavigation/Block/Catalog/Product/. From this block, we can obtain information about the Previous and Next products with the use of their links.
getSortedArray()
Using the getSortedArray() function defined below in the code you can get products with their positions from the admin backend. Of course, the admin sets the positions in the admin panel.
Magento will, by default settings on the category page (sort by position), do all the things needed in order for this to work well. The only thing you need to do is to fetch the already sorted array ($jsonSort = $block->getSortedArray([]), this piece of code with all cookie logic is found below), which you can get and write in the cookie while loading a category page.
        ...
            //if cookies are deleted, get product last category and format the output array
            if (is_null($decodedSortArray)) {
                if (!is_null($categoryIdsArray)) {
                    $lastCatId = end($categoryIdsArray);
                    $decodedSortArray = $this->getProductCollection($lastCatId);
                }
                return false;
            }
$decodedSortArray
You need to flip the keys of the array because you need them to be sorted in the right order. For example:
10934 = “0” to 0 = 10934
10931 = “1” to 1 = 10931
10938 = “2” to 2 = 10938
$decodedSortArrayFlipped = array_flip($decodedSortArray);On many occasions, you need to check if the variable exists, and to be careful not to get undefined offset. Another possibility would be to wrap it in and try to catch the block.
In the code below, $decodedSortArray[$decodedSortArray[$prod_id]+1], you can get Next product from the $decodedSortArray variable which can be retrieved from the cookie. Then, you need to form a URL for that link by using the setUrlDataObject function.
	...
            //get next id based on position, example current prod: 10931 position 1, and next position is 2, $productId is 10938
            $productId = $nextId = $decodedSortArrayFlipped[$decodedSortArray[$prodId] + 1];
            $product = $this->productRepository->getById($productId);
            $product->setCategoryId($category->getId());
            $urlData = $this->catalogUrl->getRewriteByProductStore([$product->getId() => $category->getStoreId()]);
            if (isset($urlData[$product->getId()])) {
                $product->setUrlDataObject(new \Magento\Framework\DataObject($urlData[$product->getId()]));
            }
	...
    //get previous product function
    public function getPreviousProduct($prodId, $catId, $decodedSortArray)
    {
        $categoryIdsArray = null;
        if ($catId != 0) {
            $category = $this->categoryRepository->get($catId);
        } else {
            //if category empty- cookie got deleted or some other reason, get first category
            $product = $this->productRepository->getById($prodId);
            $categoryIdsArray = $product->getCategoryIds();
            if (isset($categoryIdsArray[0])) {
                $category = $this->categoryRepository->get($categoryIdsArray[0]);
            }
             return false;
        }
        if ($category) {
            //if cookies are deleted, get product last category and format the output array
            if (is_null($decodedSortArray)) {
                if (!is_null($categoryIdsArray)) {
                    $lastCatId = end($categoryIdsArray);
                    $decodedSortArray = $this->getProductCollection($lastCatId);
                }
                return false;
            }
You need to flip the keys of the array again, for example:
10934 = “0” to 0 = 10934
10931 = “1” to 1 = 10931
10938 = “2” to 2 = 10938
$decodedSortArrayFlipped = array_flip($decodedSortArray);
In the code below, $decodedSortArray[$decodedSortArray[$prod_id]-1], you can get Previous product from the $decodedSortArray variable which can be retrieved from the cookie. Then you form an url for that link by using setUrlDataObject function.
Product ID
$productId = $prevId = $decodedSortArrayFlipped[$decodedSortArray[$prod_id] -1];
Get the product category ID from the cookie, or, in case the cookie gets deleted, get the first category. Then, get the category from the registry, provided it is set. In case it is, you will get the category ID and name. On many occasions, the registry will return empty data, and because of that, you need to make sure that you get some data. Otherwise, you will take the first category.
With $prodListDir and $prodListOrder, you will get the array of data with products from the post. We have already fetched this data.
Category ID
     /**
     * get product category id
     *
     * @return array
     */
    public function getProdCategoryId()
    {
        $returnProdCatId = {};
        $objectManager = \Magento\Framework\App\ObjectManager::getInstance();
        $category = $objectManager->get('Magento\Framework\Registry')->registry('current_category');//get current category
        $catId = 0;
        $catName = 0;
        if (isset($category)) {
            $catId = $category->getData("entity_id");
            $catName = $category->getData("name");
        }
        //get direction from post from cookie
        $prodListDir = $this->getRequest()->getParam("product_list_dir");
        if (is_null($prodListDir)) {
            $prodListDir = 'asc';
        }
        //get type of list order, position, price, name etc
        $prodListOrder = $this->getRequest()->getParam("product_list_order");
        if (is_null($prodListOrder)) {
            $prodListOrder = 'first_time';
        }
        $returnProdCatId["direction"] = $prodListDir;
        $returnProdCatId["order"] = $prodListOrder;
        $returnProdCatId["cat_id"] = $catId;
        $returnProdCatId["cat_name"] = $catName;

        return $returnProdCatId;
    }
$sortArray
Using the function getLoadedProductCollection you are getting Magento default collection of products which is loaded on the category page when you visit it. Then, go through it and add it to $sortArray array.
    /**
     * get sorted array based on preloaded product collection
     *
     * @param $productCollection
     * @return false|string|null
     */
    public function getSortedArray($productCollection)
    {
        $jsonSort = null;

        if ($this->getLayout()->getBlock('category.products.list')) {
            $productCollection = $this->getLayout()->getBlock('category.products.list')->getLoadedProductCollection();
            //get sort array previous next
            $sortArray = {};
            $countArr = 0;
            //format product collection
            foreach ($productCollection->getItems() as $keyColl => $singleProd) {
                $sortArray[$keyColl] = (string) $countArr;
                $countArr++;
            }
            $jsonSort = json_encode($sortArray);
            //end of get sort array previous next

        }
        return $jsonSort;
    }
}
Index.php
Then, it is time to create the file Index.php in Vendor/PreviousNextNavigation/Controller/Index/. This controller is crucial for rendering the previous/next block with Ajax on the product page.
Ajax
You will need to get the data from Ajax, and this piece of code below is product and category id that is retrieved from Ajax response:
$prodId = $dataFromAjax["prod_id"] ?? 0;
$catId = $dataFromAjax["cat_id"] ?? 0;
When retrieving variables please use ?? operator.
Further exists the “??” (or null coalescing) operator, available as of PHP 7.
Example:
<?php
// Example usage for: Null Coalesce Operator
$action = $_POST['action'] ?? 'default';

// The above is identical to this if/else statement
if (isset($_POST['action'])) {
    $action = $_POST['action'];
} else {
    $action = 'default';
}
?>
The expression (expr1) ?? (expr2) evaluates to expr2 if expr1 is NULL, and expr1 otherwise. In particular, this operator does not emit a notice if the left-hand side value does not exist, just like isset(). This is especially useful on array keys.
Note: The null coalescing operator is an expression and that it doesn’t evaluate to a variable, but to the result of an expression. This is important to know if you want to return a variable by reference. The statement return $foo ?? $bar; in a return-by-reference function will therefore not work and a warning is issued.
$decodedSortArray
With the line below you can get a decoded sort array.
$decodedSortArray = json_decode($json_sorting_array, true);
$outputHtml
With the following code, you call the previous and next function from the block and return it to $outputHtml to render it on the page.
            $nextProd = $this->vendornameblock->getNextProduct($prodId, $catId, $decodedSortArray);
            $prevProd = $this->vendornameblock->getPreviousProduct($prodId, $catId, $decodedSortArray);
            $outputHtml = '';
            if($prevProd) {
                $outputHtml .= "<a class='prev_url_a' href='" . $prevProd->getProductUrl() . "' title='" . $prevProd->getName() . "'>";
                $outputHtml .= "<div class='prev'>";
fa-angle-left
Font awesome tag fa-angle-left is responsible for displaying left arrow on the page. It is not necessary for the functionality, but it sure looks good.
                $outputHtml .= "<i class='fas fa-angle-left'></i>";
                $outputHtml .= "<div class='prev-content'>";
                $outputHtml .= "<span>" . $prevProd->getName() . "</span>";
                $outputHtml .= "</div>";
                $outputHtml .= "</div>";
                $outputHtml .= "</a>";
            }
            if($nextProd) {
                $outputHtml .= "<a class='next_url_a' href='" . $nextProd->getProductUrl() . "' title='" . $nextProd->getName() . "'>";
                $outputHtml .= "<div class='next'>";
                $outputHtml .= "<i class='fas fa-angle-right'></i>";
                $outputHtml .= "<div class='prev-content'>";
                $outputHtml .= "<span>".$nextProd->getName()."</span>";
                $outputHtml .= "</div>";
                $outputHtml .= "</div>";
                $outputHtml .= "</a>";
            }
            return $this->jsonResponse($outputHtml);

        } catch (\Magento\Framework\Exception\LocalizedException $e) {
            return $this->jsonResponse($e->getMessage());
        } catch (\Exception $e) {
            $this->_logger->critical($e);
            return $this->jsonResponse($e->getMessage());
        }
    }

}
module.xml
It goes without saying that you have already created the file module.xml in Vendor/PreviousNextNavigation/etc/
<?xml version="1.0" ?>
<config xmlns:xsi="http://www.w3.org/2001/XMLSchema-instance" xsi:noNamespaceSchemaLocation="urn:magento:framework:Module/etc/module.xsd">
    <module name="Vendor_PreviousNextNavigation" setup_version="1.0.0" ></module>
</config>
routes.xml
The next thing is to create routes.xml file in Vendor/PreviousNextNavigation/etc/frontend/. You need this file for a controller, in order to catch data sent with Ajax.
<?xml version="1.0" ?>
<config xmlns:xsi="http://www.w3.org/2001/XMLSchema-instance" xsi:noNamespaceSchemaLocation="urn:magento:framework:App/etc/routes.xsd">
	<router id="standard">
		<route frontName="vendor_previousnextnavigation" id="vendor_previousnextnavigation">
			<module name="Vendor_PreviousNextNavigation"/>
		</route>
	</router>
</config>
In Vendor/PreviousNextNavigation/view/frontend/ you should create two folders. You should name the first one Layout and the second one Templates. After that, you can create two files in the Layout folder (Vendor/PreviousNextNavigation/view/frontend/layout/).
catalog_category_view.xml
The first file catalog_category_view.xml with the content mentioned below. This will add content from phtml to the category page. So, you can get it and set the category preloaded product collection, which is already sorted. It is better to render it after all of the elements with attribute after=”-”, at the end of the document body, so it will get all of the required data.
        <referenceContainer name="content">
            <block class="Vendor\PreviousNextNavigation\Block\Catalog\Product\PrevNextLink" name="category.products.list.custom" as="custom_name" template="Vendor_PreviousNextNavigation::catalog/product/list_custom.phtml" after="-" />
        </referenceContainer>
It will load list_custom.phtml at the end of the list.phtml no matter if it has been extended by other modules or not. From this layout, you can get some crucial pieces of information crucial for loading and displaying Previous-Next products.
catalog_product_view.xml
The second file is catalog_product_view.xml where you load product links in the product view page.
    <referenceContainer name="content">
        <block template="Vendor_PreviousNextNavigation::catalog/product/prev_next_link.phtml" class="Vendor\PreviousNextNavigation\Block\Catalog\Product\PrevNextLink" name="sr_product_prev_link" before="-">
        </block>
    </referenceContainer>
In templates folder you should create two files at the path:
Vendor/PreviousNextNavigation/view/frontend/templates/catalog/product/.
list_custom.phtml
The first file is list_custom.phtml with its content below. Once this file is loaded at the end of list.phtml it will gather information about the product collection array and the product category ID. All of this data will be stored in the cookie, which is going to be used in the block.
<?php
//get sorted array from preloaded collection from list phtml
$jsonSort = $block->getSortedArray([]);
//get product category id from block
$catidBlockData = $block->getProdCategoryId();

?>
<script type="text/javascript">
    require([
        'jquery',
        'jquery/jquery.cookie'
    ], function(jQuery){
        var $j = jQuery.noConflict();
        $j(document).ready(function () {
The lines below are responsible for setting the cookie. i.e., the category name and ID, product order, sorted array of products’ data, and product sorting direction. Of course, cookies play an important part in storing and returning data. Cookie arguments are:
Name: The name of the cookie which will be used for collecting data
Value: The value of the cookie
Path: Define the path where the cookie is valid. By default, the path of the cookie is the path of the page where the cookie was created (standard browser behavior). If you want to make it available, for instance, across the entire domain use path: ‘/’. Default: the path of the page where the cookie was created.
            <?php if($catidBlockData["order"]) { ?>
            $j.cookie('product_list_order', '<?php echo $catidBlockData["order"]; ?>', { path: "/"}); // Set Cookie Value
            <?php } ?>
            <?php if($jsonSort) { ?>
            $j.cookie('sort_array', '<?php echo $jsonSort; ?>', { path: "/"}); // Set Cookie Value
            <?php } ?>
            $j.cookie('product_list_dir', '<?php echo $catidBlockData["direction"]; ?>', { path: "/"}); // Set Cookie Value
        });
    });
</script>
prev_next_link.phtml
The second and the last file is prev_next_link.phtml. In this file, Ajax is called when the file is loaded, returning all data in order to display the links.
<?php
//get id of current product
$objectManager = \Magento\Framework\App\ObjectManager::getInstance();
$currentProduct = $objectManager->get('Magento\Framework\Registry')->registry('current_product');//get current product information
$blockProdId = $currentProduct->getId();
?>
Then, send category and product data through the controller with Ajax. After rendering data, you need to append the response from Ajax to the element which is already displayed on the product view. But remember that you need to do styling for this element. It needs to be consistent with the current design.
<script type="text/javascript">
    require(["jquery"],function($) {
        $(document).ready(function() {
            var customurl = "<?php echo $this->getUrl().'vendor_previousnextnavigation/index/index'?>";
            var catIdCookie = getCookie('cat_id');
            var jsonSortArray = getCookie('sort_array');
            //send ajax to customurl above
            //get from cookie - category id, product id, and array of products - jsonSortArray
            $.ajax({
                url: customurl,
                type: 'POST',
                dataType: 'json',
                data: {
                    cat_id: catIdCookie,
                    prod_id: <?php echo $blockProdId; ?>,
                    json_sort_array: jsonSortArray
                },
                complete: function(response) {
                    var responseObj = response.responseJSON;
                    //append response to the .previous_next div
                    $(document).find(".previous_next").append(responseObj);
                },
                error: function (xhr, status, errorThrown) {
                    console.log('Error with previous/next ajax. Try again.');
                }
   });
        });
This is a simple function from which you can get the cookie based on the name:
        //get cookie by name function
        function getCookie(cname) {
            var name = cname + "=";
            var decodedCookie = decodeURIComponent(document.cookie);
            var ca = decodedCookie.split(';');
            for(var i = 0; i <ca.length; i++) {
                var c = ca[i];
                while (c.charAt(0) == ' ') {
                    c = c.substring(1);
                }
                if (c.indexOf(name) == 0) {
                    return c.substring(name.length, c.length);
                }
            }
            return "";
        }
    });
</script>
If you have created all of the necessary files, run the following commands:
php bin/magento setup:upgrade
php bin/magento setup:static-content:deploy -f
php bin/magento cache:flush
Now it is time to refresh the page and see the results.
Wrap Up
This extension works every time, regardless of the product category/subcategory. Each sorting setting is going to be applied to the product’s array and displayed properly. These settings include Magento default ones, i.e., position, price, name, etc.
In case you want to purchase a fully functional module, please contact us at [email protected]
Source
